Diy Wall Art Ideas That Look Store-bought
I remember standing in my first tiny apartment in New York, staring at those sterile, white walls and feeling like the space had no soul. I had scrolled through endless Pinterest boards, feeling completely overwhelmed by the idea that I needed expensive canvases or professional studio equipment to create something beautiful. But here’s the truth: you don’t need a massive budget or a degree in fine arts to transform your home; you just need a bit of intention and some found treasures. Learning how to make wall art isn’t about following rigid, expensive trends, but about reimagining the materials already surrounding you—whether that’s a collection of smoothed sea glass from a Maine morning or some reclaimed wood from a local workshop.
In this guide, I’m stripping away the fluff and the high-priced art store checklists to show you the real way to decorate. I’ll walk you through several low-impact, high-style methods that blend digital inspiration with tactile, earth-friendly materials. We are going to explore how to turn “clutter” into curated masterpieces, ensuring your sanctuary feels both modern and deeply personal. Let’s dive in and start creating something that actually tells your story.
Table of Contents
- Step-by-Step Instructions
- Mastering Easy Canvas Painting Techniques for Coastal Vibes
- Budget Friendly Wall Decor Projects Using Found Treasures
- Elevating Your Art: Five Pro-Tips for a Soulful, Sustainable Gallery
- Bringing the Essence of Sustainability Home
- ## The Soul of Your Space
- Bringing Your Vision to Life
- Frequently Asked Questions
Guide Overview
Tools & Supplies
- Paintbrush (various sizes for application)
- Pencil (for sketching designs)
- Ruler (for measuring proportions)
- Canvas or Wood Panel (1 piece)
- Acrylic Paint (set of multiple colors)
- Palette Knife (1 piece)
- Water Container (1 piece)
Step-by-Step Instructions
- 1. First, let’s gather our “treasures.” Instead of heading to a big-box craft store, I want you to look toward nature or even your own recycling bin. I personally love scouring the coastline for pieces of weathered sea glass or smooth driftwood, but you can also repurpose old wooden frames or even interesting pieces of cardboard from recent deliveries. The goal is to ensure that your art begins with materials that already exist in your world.
- 2. Once you’ve collected your items, it’s time to clean and prep them. If you’re using sea glass or stones, a quick soak in warm, soapy water will remove any salt or grit, making them truly shine when they catch the light. If you’re working with reclaimed wood, give it a gentle sand to smooth out any rough edges so it feels comfortable to the touch. This little bit of prep work is the difference between something that looks cluttered and something that feels intentionally curated.
- 3. Now, let’s play with the layout. Before you reach for the glue, lay your pieces out on a flat surface—or even better, lay them directly onto the frame or backing you intend to use. This is your moment to experiment with composition. Don’t be afraid to leave some negative space; sometimes, what isn’t there is just as important as what is. I find that a slightly asymmetrical arrangement often feels more organic and alive.
- 4. With your vision set, it’s time to make it permanent. I highly recommend using a non-toxic, water-based adhesive to keep your project as eco-friendly as possible. Apply the glue sparingly to the back of your objects, pressing them firmly into place. If you’re working with heavier items like thick pieces of driftwood, you might need to reinforce the bond with a bit of natural twine or jute to secure them to your base.
- 5. While the adhesive sets, take a moment to think about the “frame” of your story. If you aren’t using an old picture frame, you can create a border using dried botanical elements or even simple hemp cord. This adds a layer of textural depth that makes the piece feel finished. It’s all about those small, thoughtful details that turn a simple collection of objects into a cohesive piece of art.
- 6. Once everything is completely dry and secure, give your masterpiece a final inspection. If you used sea glass, you might want to place it near a window where the natural sunlight can dance through the colors. This final step is where the magic happens—seeing your found objects transform into a beautiful, sustainable statement piece that tells a story every time you walk past it.
Mastering Easy Canvas Painting Techniques for Coastal Vibes
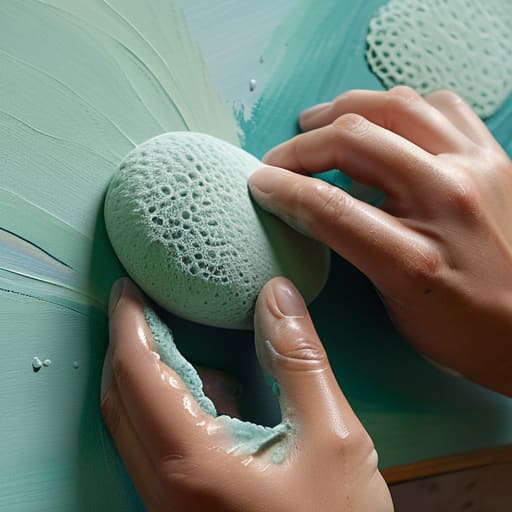
If you’re feeling a little intimidated by a blank canvas, don’t sweat it. You don’t need to be a master painter to capture that serene, seaside energy. I’ve found that some of the most soul-stirring pieces come from using easy canvas painting techniques that prioritize feeling over perfection. Instead of trying to paint a hyper-realistic wave, try layering soft washes of cerulean and seafoam green. Using a sponge or even a crumpled piece of recycled paper can create organic, misty effects that mimic the Maine fog rolling over the Atlantic. It’s all about embracing the movement rather than the precision.
To really elevate your piece, I love experimenting with textural art methods to give the surface some life. You can mix a little sand from your last beach walk directly into your acrylics to create a gritty, tactile sensation that feels grounded and real. This approach turns a simple painting into a multi-dimensional experience. Combining these textures with a few bits of found sea glass or driftwood makes these budget friendly wall decor projects feel incredibly high-end and deeply personal to your own journey.
Budget Friendly Wall Decor Projects Using Found Treasures
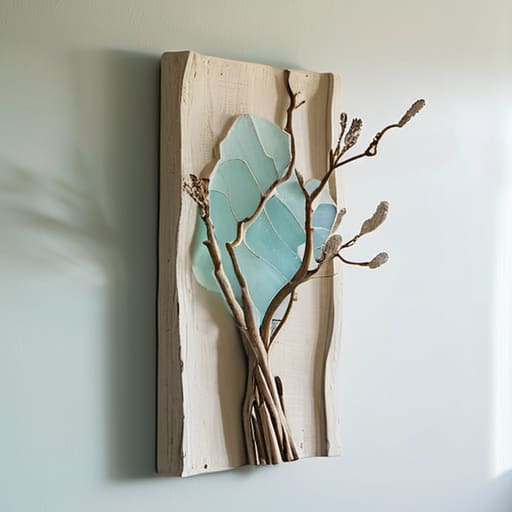
One of my favorite things about being a maker is that you don’t need a massive budget to create something that feels high-end and soulful. In fact, some of the most impactful budget friendly wall decor projects I’ve ever tackled started with nothing more than a handful of treasures I found during a morning walk. Whether it’s a weathered piece of driftwood or a collection of frosted sea glass, these natural elements bring an organic energy to a room that store-bought items just can’t replicate.
To really elevate these pieces, I love experimenting with textural art methods to bridge the gap between the raw finds and a polished aesthetic. Try mounting your sea glass onto a reclaimed wood slice using a bit of eco-friendly adhesive, or layer sand and crushed shells onto a small board to create a 3D landscape. By incorporating these mixed media art supplies, you aren’t just decorating; you’re telling a story of the coast. It’s about finding beauty in the discarded and giving it a second life on your walls, proving that sustainability and style truly go hand in hand.
Elevating Your Art: Five Pro-Tips for a Soulful, Sustainable Gallery
- Curate with Intention: Before you glue or paint, take a moment to step back and look at your space. Your wall art shouldn’t just fill a void; it should tell a story that resonates with your personal journey and the natural world around you.
- Embrace the Imperfect: Don’t sweat the small stuff. In the world of sustainable DIY, a little bit of texture or an uneven edge on a piece of driftwood adds character and authenticity that mass-produced decor simply can’t mimic.
- Layer Your Textures: To get that cozy, coastal-inspired depth, try mixing different mediums. Pairing a smooth canvas painting with the rugged, tactile feel of sea glass or reclaimed wood creates a visual richness that draws the eye in.
- Mind Your Palette: Stick to a cohesive color story to keep your sanctuary feeling peaceful. Think of the soft greys of a Maine morning or the muted greens of a forest floor; these natural tones make even the most eclectic collections feel harmonious.
- Think Beyond the Frame: Remember that the “frame” doesn’t have to be store-bought. Use found elements like sturdy branches or even vintage textiles to house your pieces, turning the presentation itself into a piece of eco-conscious art.
Bringing the Essence of Sustainability Home
Remember that true style doesn’t require a trip to a big-box store; the most soulful decor often comes from repurposing what nature—or even your own junk drawer—has already provided.
Don’t be afraid to let your art be imperfect; those raw edges and organic textures are what give your space that authentic, lived-in coastal character.
Every piece you create is a small victory for the planet, proving that we can curate beautiful, modern sanctuaries without leaving a heavy footprint behind.
## The Soul of Your Space
“Creating wall art isn’t just about filling an empty space; it’s about curating a visual narrative of your values, where every piece of sea glass or hand-painted stroke tells a story of intentional living and a deep connection to the world around us.”
Jordan Mitchell
Bringing Your Vision to Life
As we wrap up this creative journey, I hope you feel more confident stepping into your own artistic sandbox. Whether you’ve been experimenting with those soft, coastal canvas textures or breathing new life into discarded objects through our budget-friendly treasure hunts, you’ve proven that beautiful decor doesn’t require a massive carbon footprint or a huge bank account. By choosing to repurpose found materials and leaning into intentional creativity, you aren’t just decorating a room; you are actively curating a space that honors the planet. Remember, the goal isn’t perfection—it’s about finding that unique harmony between your personal style and the natural world that surrounds us.
Ultimately, the art we hang on our walls should tell a story, and I want yours to be one of mindfulness and connection. Every time you glance at a piece of sea glass art or a hand-painted landscape, let it serve as a gentle reminder that our small, daily choices truly ripple outward. Don’t be afraid to get your hands a little messy or to try a technique that feels completely new to you. Small, intentional actions are the seeds of a much larger movement, and your home is the perfect place to start growing that change. I can’t wait to see how you transform your sanctuary!
Frequently Asked Questions
How can I ensure the natural materials I find, like driftwood or sea glass, are properly cleaned and preserved before I start my project?
That’s such a vital question! Before we dive into the creative part, we have to respect the materials. For sea glass, a gentle soak in warm, soapy water works wonders to lift away salt and grime. For driftwood, I recommend letting it dry completely in the sun, then giving it a light scrub with a soft brush. If you’re worried about tiny hitchhikers, a quick bake in a low-heat oven ensures everything is pristine and ready for your sanctuary.
Are there specific eco-friendly or non-toxic paints and adhesives you recommend to keep my DIY projects truly sustainable?
When you’re crafting something beautiful, you want to ensure the materials are as kind to your home as they are to the planet. I personally lean toward natural mineral pigments or milk paints—they offer such a gorgeous, soft texture. For adhesives, skip the harsh synthetics and reach for non-toxic, water-based glues or even natural flour paste for paper crafts. It keeps your indoor air clean and ensures your creative process stays truly soul-deep and sustainable.
I'm worried about my walls—what’s the best way to hang heavier, nature-inspired pieces without causing permanent damage to my rental space?
I completely hear you—the “rental struggle” is real when you want your space to feel like a soulful sanctuary. To keep those beautiful, heavier pieces secure without leaving a trace, I’m a huge fan of heavy-duty Command strips or adhesive hooks designed for weight. If you’re feeling a bit more adventurous, small finishing nails are often much easier to patch up later than large drill holes. It’s all about finding that balance between security and sustainability!
