Creative Diy Planters Made From Things You Already Own
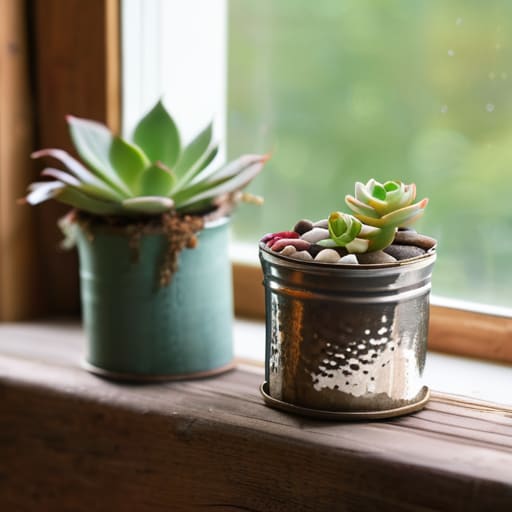
I was standing in my kitchen last Tuesday, staring at a pile of empty tin cans and a cracked ceramic mug, feeling that familiar pang of guilt we all get when we realize how much “stuff” we’re about to toss. We’ve been conditioned to believe that creating a beautiful, lush indoor garden requires a hefty trip to a big-box retailer to buy mass-produced plastic pots, but that’s a total myth. In reality, some of the most soulful and eco-chic greenery comes from the things we already own. By crafting your own diy planters, you aren’t just saving a few dollars; you’re reclaiming your space from the cycle of mindless consumption and giving discarded objects a second, much more beautiful life.
In this guide, I’m stripping away the fluff to give you a practical, no-nonsense roadmap for upcycling your household items into stunning vessels. We’ll move past the Pinterest-perfect illusions and focus on what actually works—from ensuring proper drainage to selecting materials that won’t harm your plants’ roots. I promise to share honest, actionable steps that blend a bit of my coastal Maine aesthetic with modern, resourceful living, so you can grow your urban jungle with intention and style.
Table of Contents
- Step-by-Step Instructions
- Upcycled Container Gardening Breathing New Life Into Forgotten Treasures
- Budget Friendly Garden Decor Crafting Coastal Charm on a Dime
- Small Shifts, Big Impact: My Golden Rules for Intentional Planter Crafting
- Small Steps, Big Waves: Carrying the Spirit of Sustainability Forward
- The Soul of a Sustainable Space
- Cultivating Change, One Pot at a Time
- Frequently Asked Questions
Guide Overview
Tools & Supplies
- Drill and drill bits for creating drainage holes
- Measuring tape for accurate sizing
- Sandpaper to smooth rough edges
- Upcycled containers (tin cans, plastic bottles, or wooden crates) 2-4 units
- Potting soil 1 bag
- Small plants or seeds 3-5 units
- Decorative paint or twine for embellishment 1 set
Step-by-Step Instructions
- 1. First, let’s scout your space for potential treasures. Instead of heading to a big-box store, I want you to look through your recycling bin or that “junk drawer” in your kitchen. Old tin cans, cracked ceramic mugs, or even sturdy glass jars work beautifully. The goal is to find something with character and soul that can be repurposed rather than replaced.
- 2. Once you’ve gathered your vessels, give them a deep clean. If you’re using old tin cans, make sure to scrub away any lingering food residue and use a file or sandpaper to smooth down any sharp edges. It’s all about creating a safe and inviting home for your new plant friends, much like the careful way I prep my DIY sea glass frames.
- 3. Now, let’s talk about drainage—it’s the unsung hero of plant health. If you’re using a container without holes, grab a hammer and a large nail (or a drill if you have one handy) to carefully create a few small openings at the bottom. This prevents water from pooling and causing root rot, ensuring your greenery can truly thrive in its new eco-friendly housing.
- 4. This is where your creative spirit really takes the lead. To give your planters that “eco-chic” aesthetic I love so much, try decorating them with natural elements. You could use twine to wrap a glass jar, or even use some non-toxic, water-based paint to mimic the soft, muted hues of the Maine coastline. If you have any leftover sea glass, this is the perfect moment to glue a few pieces onto the surface for a bit of coastal magic.
- 5. Before we add the greenery, it’s time to layer in some foundation. Place a thin layer of small pebbles or even some crushed terracotta bits at the very bottom of your planter. This creates a little reservoir for excess moisture and helps with airflow, acting as a natural filtration system for your plant’s root zone.
- 6. Next, add a high-quality, organic potting mix. I always recommend choosing a blend that is peat-free whenever possible to support healthier ecosystems. Gently spoon the soil into your container, leaving about an inch of space at the top so that when you water your plant, the soil doesn’t overflow and create a mess.
- 7. Finally, it’s time for the most rewarding part: the planting. Gently remove your plant from its original nursery pot, loosen the roots slightly with your fingers, and nestle it into its new home. Press the soil down lightly to remove air pockets, give it a gentle, mindful watering, and find the perfect sun-drenched spot in your home to display your handiwork.
Upcycled Container Gardening Breathing New Life Into Forgotten Treasures
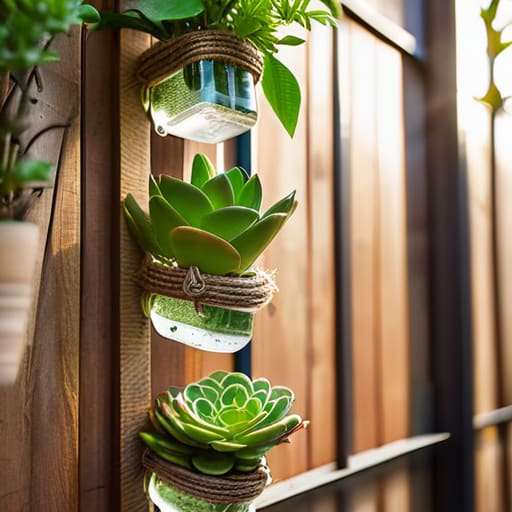
When we talk about upcycled container gardening, I like to think of it as giving a second act to objects that have lost their original purpose. It’s not just about being resourceful; it’s about seeing the potential in the mundane. For instance, if you’re working with limited space, you can easily transform old soda or water bottles into recycled plastic bottle planters. By cutting them strategically and adding a bit of twine, you can create a vertical oasis that feels intentional rather than cluttered.
If you’re looking to add a bit more structure to your balcony or windowsill, you might dive into a wooden planter box tutorial using reclaimed pallet wood. There is something incredibly grounding about working with natural textures, much like the weathered driftwood I often find on the Maine coast. Even if you aren’t quite ready for heavy woodworking, you can still master hanging planter crafts using vintage tin cans or even old ceramic mugs. These small, budget-friendly garden decor touches allow you to cultivate a lush, green sanctuary that reflects your personal style without leaving a heavy footprint on our beautiful planet.
Budget Friendly Garden Decor Crafting Coastal Charm on a Dime
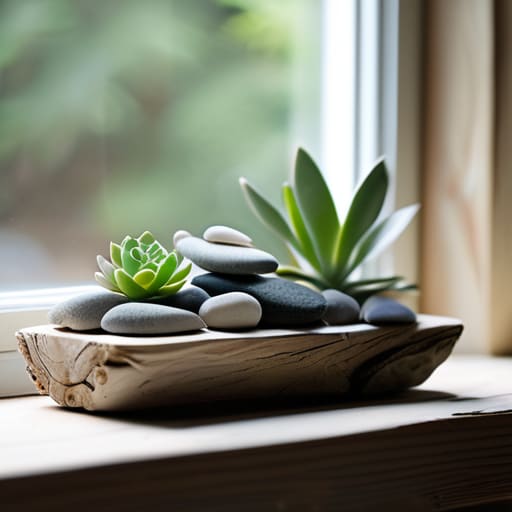
You don’t need a massive renovation budget to infuse your living space with that calming, seaside energy I grew up with in Maine. Sometimes, the most soul-stirring pieces are the ones we find in the most unexpected places. I love scouring local thrift stores or even just looking at my own recycling bin through a different lens. For instance, if you’re looking for some quick budget friendly garden decor, try gathering smooth stones or even that weathered driftwood you might find on a walk. Pairing these natural elements with your greenery creates a look that feels effortlessly curated rather than store-bought.
If you’re working with limited space, don’t overlook the potential of verticality. I’ve found that simple hanging planter crafts using repurposed macramé or even sturdy jute twine can transform a bare wall into a lush, living tapestry. It’s about seeing the potential in the mundane—like turning a discarded glass jar into a chic vessel for a small fern. By focusing on these small, intentional details, you aren’t just decorating; you’re practicing a form of creative stewardship that honors both your wallet and our beautiful planet.
Small Shifts, Big Impact: My Golden Rules for Intentional Planter Crafting
- Prioritize drainage above all else; your plants need to breathe just like we do, so always ensure your upcycled containers have a way for excess water to escape to prevent root rot.
- Think beyond the obvious by scouting your local thrift stores or even your own pantry for unique vessels, because a vintage tin or a ceramic mug often holds more character than a store-bought plastic pot.
- Layer your materials thoughtfully to create a miniature ecosystem, using small pebbles or even some of that crushed sea glass I love so much at the bottom to aid water flow and add a touch of coastal magic.
- Don’t be afraid to get a little messy with natural aesthetics, using jute twine or reclaimed wood to wrap your planters, giving them that perfect “eco-chic” look that blends seamlessly with your indoor greenery.
- Remember that sustainability is a journey of trial and error, so if a particular material doesn’t hold up to moisture, don’t sweat it—just pivot, repurpose, and try again with a new intention.
Small Steps, Big Waves: Carrying the Spirit of Sustainability Forward
Remember that beauty doesn’t have to come from a store; by repurposing what we already own, we’re honoring the earth and giving forgotten objects a second, more meaningful life.
Let your personal style guide your garden, whether you’re channeling the rugged textures of the Maine coast or the sleek lines of modern urban living, to create a space that truly feels like home.
Don’t underestimate the power of intention—every single upcycled planter is a quiet, beautiful protest against waste and a step toward a more conscious way of living.
The Soul of a Sustainable Space
“A DIY planter is more than just a vessel for soil and seeds; it’s a quiet, intentional act of reclamation that proves we don’t need to consume more to grow something beautiful—we just need to see the potential in what we already hold.”
Jordan Mitchell
Cultivating Change, One Pot at a Time
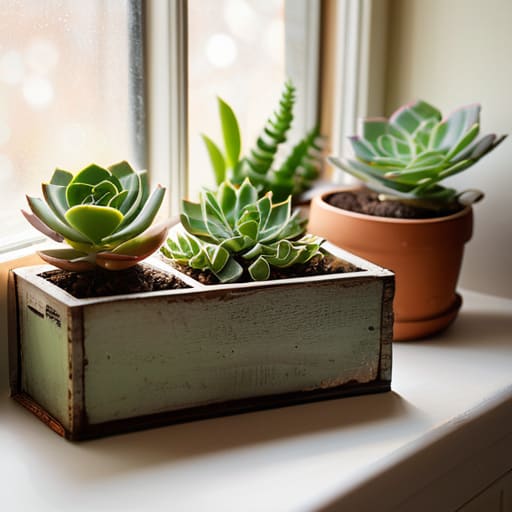
As we wrap up this journey of transformation, I hope you feel empowered by the possibilities we’ve explored. From breathing new life into forgotten pantry containers to crafting that specific, sun-drenched coastal charm through budget-friendly decor, we’ve seen that gardening doesn’t require a massive footprint or a massive budget. It’s really about the intentionality behind what we choose to bring into our homes. By repurposing what we already own and decorating with a mindful eye, we aren’t just making our spaces more beautiful; we are actively reducing waste and honoring the resources the earth provides us.
Ultimately, these DIY planters are more than just vessels for soil and seedlings; they are tangible symbols of a sustainable lifestyle in motion. Just like the smoothed edges of the sea glass I find on the Maine coast, our individual efforts might seem small and solitary at first, but together, they contribute to a much larger, beautiful landscape of change. I encourage you to step outside, get your hands a little dirty, and start planting something that reflects your values. Remember, every small, green choice you make is a seed planted for a brighter, more resilient future.
Frequently Asked Questions
How do I ensure my upcycled containers have proper drainage without ruining the aesthetic?
This is such a common hurdle! You don’t want a swampy mess ruining your aesthetic. I like to use a small drill bit to create discreet holes in the bottom of my upcycled finds—it’s much cleaner than a hammer and nail. If you’re working with something delicate, like a vintage ceramic piece, try using a “cachepot” method: keep the plant in its plastic nursery liner and simply nestle it inside your beautiful container. It’s effortless, stylish, and keeps those roots breathing perfectly.
Which types of plants thrive best in smaller, DIY containers versus larger repurposed ones?
Think of your containers like little ecosystems. For those smaller, charming DIY vessels—like my upcycled tea tins or sea glass jars—stick to compact beauties like succulents, herbs, or microgreens. They don’t need much room to stretch their roots. For your larger, repurposed finds, like old wooden crates or galvanized buckets, you can really go big! Think sprawling tomato plants, bushy peppers, or even fragrant lavender that loves the extra space to thrive.
Are there specific eco-friendly potting mixes I should use to keep my urban garden truly sustainable?
Absolutely! To keep your urban oasis truly green, steer clear of those heavy peat-based mixes—harvesting peat moss can actually disrupt delicate wetland ecosystems. Instead, I love reaching for coconut coir; it’s a brilliant, renewable byproduct of the coconut industry. Mixing it with organic compost and perlite creates a lightweight, nutrient-rich foundation that feels just as restorative as the coastal soil back home in Maine. It’s all about choosing ingredients that give back more than they take.
