How to Paint a Room Like a Professional
I remember standing in my first tiny apartment, staring at a wall of depressing, nicotine-stained beige, clutching a cheap roller and feeling completely overwhelmed. I thought that learning how to paint a room was just about slapping pigment onto drywall, but I quickly learned that the real magic lies in the preparation and the intention behind your choices. It’s not just about a fresh coat of color; it’s about creating a sanctuary that feels as intentional and revitalizing as a morning walk along the Maine coast.
In this guide, I’m stripping away the complicated jargon to give you the honest, no-nonsense truth about DIY painting. We aren’t just going to talk about brushes and tape; we’re going to dive into how you can select eco-friendly, low-VOC finishes that protect your indoor air quality without sacrificing that high-end, designer look. From prepping your surfaces like a pro to mastering the perfect stroke, I’ll show you how to transform your space through mindful, sustainable creativity that truly lasts.
Table of Contents
- Step-by-Step Instructions
- Curating Your Essential Painting Tools List Sustainably
- Mastering How to Prep Walls for Painting With Intention
- Small Shifts for a Big Impact: My Top 5 Painting Pro-Tips
- Small Steps, Big Impact: My Top Three Takeaways
- More Than Just a Fresh Coat
- The Final Stroke of Intentionality
- Frequently Asked Questions
Guide Overview
Tools & Supplies
- Angled brush for cutting in edges
- Roller and frame for large surfaces
- Paint tray for holding paint
- Extension pole for high areas
- Interior paint (1-2 gallons per room)
- Painter's tape (1-2 rolls)
- Drop cloths (2-3 sheets)
- Sandpaper (1 pack fine grit)
Step-by-Step Instructions
- 1. Before you even crack open a paint can, you need to clear the canvas. Move your furniture to the center of the room and cover it with old cotton sheets—I prefer using repurposed textiles over plastic tarps whenever possible to avoid more single-use waste. Sweep or vacuum the baseboards and walls to ensure you’re working on a clean surface; even a little bit of dust can prevent your new eco-friendly pigment from bonding perfectly to the wall.
- 2. Next, it’s all about the prep work, which is honestly where the magic happens. Grab some painter’s tape to map out your edges, and if you can, look for a brand made from natural crepe paper rather than synthetic materials. Use a damp cloth to wipe down any scuffs or marks, and if you’re dealing with small holes, patch them up with a non-toxic spackle. Taking this extra time now ensures your finish looks seamless and professional later on.
- 3. Now, let’s talk about your tools. Instead of buying a cheap set of plastic rollers that you’ll toss in the bin next week, invest in high-quality, biodegradable or washable brushes and rollers. I always keep a small kit of natural-fiber brushes handy—they hold the paint better and feel much more intentional in your hands. Having the right gear makes the process feel less like a chore and more like a creative ritual.
- 4. It’s time to start “cutting in.” This means using your brush to paint the edges, corners, and areas around trim where a roller can’t reach. Work in small sections to keep the edges crisp, and try to stay rhythmic and steady with your hand. This step is the foundation of a great room, so don’t rush it; you want those lines to be as sharp as a coastline when the light hits them.
- 5. Once your edges are set, grab your roller and start applying the paint to the larger wall surfaces. I like to use a “W” or “M” motion to distribute the paint evenly, which helps prevent those annoying streak marks. If you’ve chosen a high-quality, low-VOC paint, you’ll notice the scent is much gentler, making the whole experience feel far more refreshing. Aim for thin, even coats rather than trying to hide everything in one heavy layer—patience is key here.
- 6. After your first coat has completely dried, it’s time for the second pass. This is what truly brings the depth and richness of your chosen color to life. Check for any patches that might need a little extra love and apply a second layer where necessary. Once you’re finished, don’t just toss your brushes in the trash; clean them thoroughly with warm water so they’re ready for your next project, keeping the cycle of reuse alive.
Curating Your Essential Painting Tools List Sustainably
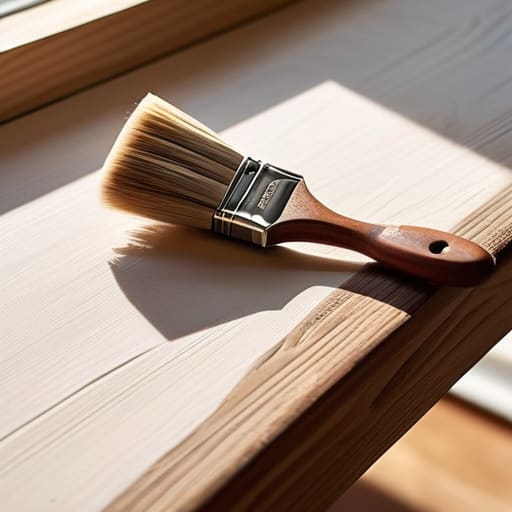
Before you dive into the actual application, let’s talk about what you’ll actually need on your workbench. When putting together your essential painting tools list, I always encourage a “quality over quantity” mindset. Instead of grabbing a handful of cheap, plastic-heavy brushes that will end up in a landfill by next season, invest in a few high-quality, ergonomic tools. I’ve found that a well-made natural bristle brush or a reusable microfiber roller cover makes a world of difference. It’s much easier to master painting techniques for beginners when your equipment actually works with you rather than against you, helping you achieve that smooth, professional finish without the unnecessary waste.
I also love the idea of “borrowing” rather than buying. If you’re just tackling a small accent wall, check if a neighbor has a drop cloth or a sturdy tray you can borrow. If you do need to buy new, look for bamboo-handled tools or recycled metal trays. It’s these little shifts in how we source our gear that turn a simple home improvement task into a meaningful act of stewardship.
Mastering How to Prep Walls for Painting With Intention

Before you even crack open a can of pigment, the real magic happens in the preparation. I like to think of this stage as setting the foundation for your sanctuary; if you rush it, the final result will always feel a bit rushed, too. When learning how to prep walls for painting, the most important step is often the most overlooked: cleaning. I always grab a damp cloth and a mild, eco-friendly soap to wipe away dust and oils. It sounds simple, but it ensures your new color bonds deeply with the surface rather than just sitting on top of a layer of grime.
Once the walls are clean, it’s time to get tactical with your protection. I’ve learned the hard way that meticulous masking saves hours of frustration later. Take your time covering trim and baseboards with painter’s tape, ensuring the edges are pressed down firmly to prevent any accidental bleeds. It’s a meditative process, really—much like sorting through my sea glass collection—where patience pays off in those crisp, professional lines that make a DIY project truly shine.
Small Shifts for a Big Impact: My Top 5 Painting Pro-Tips
- Don’t just buy more; borrow or buy secondhand. Before you head to the big-box store for brushes and rollers, check local community groups or thrift shops. You’d be surprised how many high-quality, barely-used tools are looking for a second life, which keeps perfectly good items out of our landfills.
- Master the art of the “mini-batch.” Instead of buying gallons of paint for every single accent wall or trim detail, try to find smaller containers. It reduces leftover waste significantly, and honestly, it’s much easier to manage when you’re working in smaller, more intentional spaces.
- Let nature do the heavy lifting with ventilation. Instead of relying on electric fans that pull energy, crack open those windows. A steady cross-breeze not only helps the paint dry more naturally but also keeps your indoor air quality as crisp and clean as a morning walk on the Maine coast.
- Test your colors with intention, not just intuition. Grab those small sample pots and paint large swatches on different walls. Watch how the light shifts from morning to evening; it’s a small way to ensure you fall in love with your choice and avoid the environmental cost of having to repaint because the shade felt “off.”
- Clean your tools with biodegradable soap. When you’re finished, skip the harsh chemical solvents. Using a gentle, eco-friendly soap to clean your brushes and rollers is a simple, mindful way to ensure that what goes down your drain isn’t harming the waterways we all rely on.
Small Steps, Big Impact: My Top Three Takeaways
Remember that sustainability isn’t about perfection; it’s about the intentionality behind your tools and materials. Choosing low-VOC paints or repurposing old brushes might feel small, but it’s these conscious decisions that collectively protect our indoor air and our planet.
Preparation is where the magic—and the longevity—happens. Taking that extra time to prep your walls with care doesn’t just ensure a professional finish; it prevents the need for frequent repainting, which ultimately reduces waste and saves your resources.
Let your space reflect your values. Painting a room is more than just a home improvement task; it’s an opportunity to curate an environment that feels as fresh and revitalizing as a morning walk on the Maine coast, blending modern style with a deep respect for nature.
More Than Just a Fresh Coat
“Painting a room isn’t just about changing a color on a wall; it’s about intentionally reshaping the energy of your sanctuary, choosing materials that honor both your personal style and the earth we all call home.”
Jordan Mitchell
The Final Stroke of Intentionality
As you step back to admire your handiwork, take a moment to appreciate the layers of care you’ve poured into this project. From selecting low-VOC pigments that protect your indoor air quality to curating a toolkit of reusable, sustainable supplies, you’ve proven that home improvement doesn’t have to come at the expense of the earth. By prioritizing thorough wall preparation and choosing mindful materials, you haven’t just refreshed a room; you have practiced the art of intentional living within your own four walls. It’s about more than just a new coat of color—it’s about the thoughtful process that led you to this finished space.
I truly believe that these moments—the quiet, focused hours spent transforming our immediate surroundings—are where real change begins. It might feel like just a small DIY project, but every eco-conscious decision ripples outward, much like the tide washing smooth a piece of sea glass on a Maine shore. I hope this guide has inspired you to see your home not just as a place to live, but as a canvas for your values. Remember, small, everyday actions are the building blocks of a greener future. Go ahead, enjoy your beautiful new sanctuary, and keep making choices that reflect the vibrant, sustainable world we all want to inhabit.
Frequently Asked Questions
How can I figure out if the leftover paint is still good to use, or is it time to find a way to dispose of it responsibly?
Before you toss that old can, give it the “sniff and stir” test. If it smells sour or has a funky odor, bacteria has likely moved in—it’s time to say goodbye. If it’s chunky or has a skin on top, try stirring it thoroughly; if it doesn’t smooth out, it’s past its prime. If it’s still creamy, seal it tight! If you must dispose of it, check local guidelines to ensure it doesn’t end up in our precious waterways.
Are there any specific ways to clean my brushes and rollers so I can reuse them for my next project without wasting more resources?
Don’t toss those tools just yet! To keep your brushes and rollers in rotation, skip the harsh chemicals and opt for a natural soap or a bit of vegetable oil to break down the pigment. For water-based paints, a gentle scrub in warm, soapy water works wonders. If you’re using oil-based, a small amount of citrus-based cleaner is a much kinder alternative to traditional solvents. It’s a tiny bit of extra care that keeps your kit—and our planet—thriving.
If I'm working in a smaller apartment, what are some tips for managing the scent and ventilation to keep my indoor air quality safe?
Living in a cozy apartment means those paint fumes can feel a bit overwhelming, fast. To keep your air as fresh as a Maine morning, prioritize cross-ventilation by opening windows on opposite sides of the room. If you can, set up a small box fan facing outward to actively pull air out. I also swear by air-purifying plants like Snake Plants or Peace Lilies—they’re beautiful, eco-chic, and help naturally refresh your sanctuary while you work.
